
Before You Start
Before setting up EVRSEND, make sure you have access to:
- Your EVRSEND account
- Admin access to your CRM
- Admin access to your Dialer.io
- Calendar access, such as Calendly, OnceHub, or Cal.com, if appointments will be booked
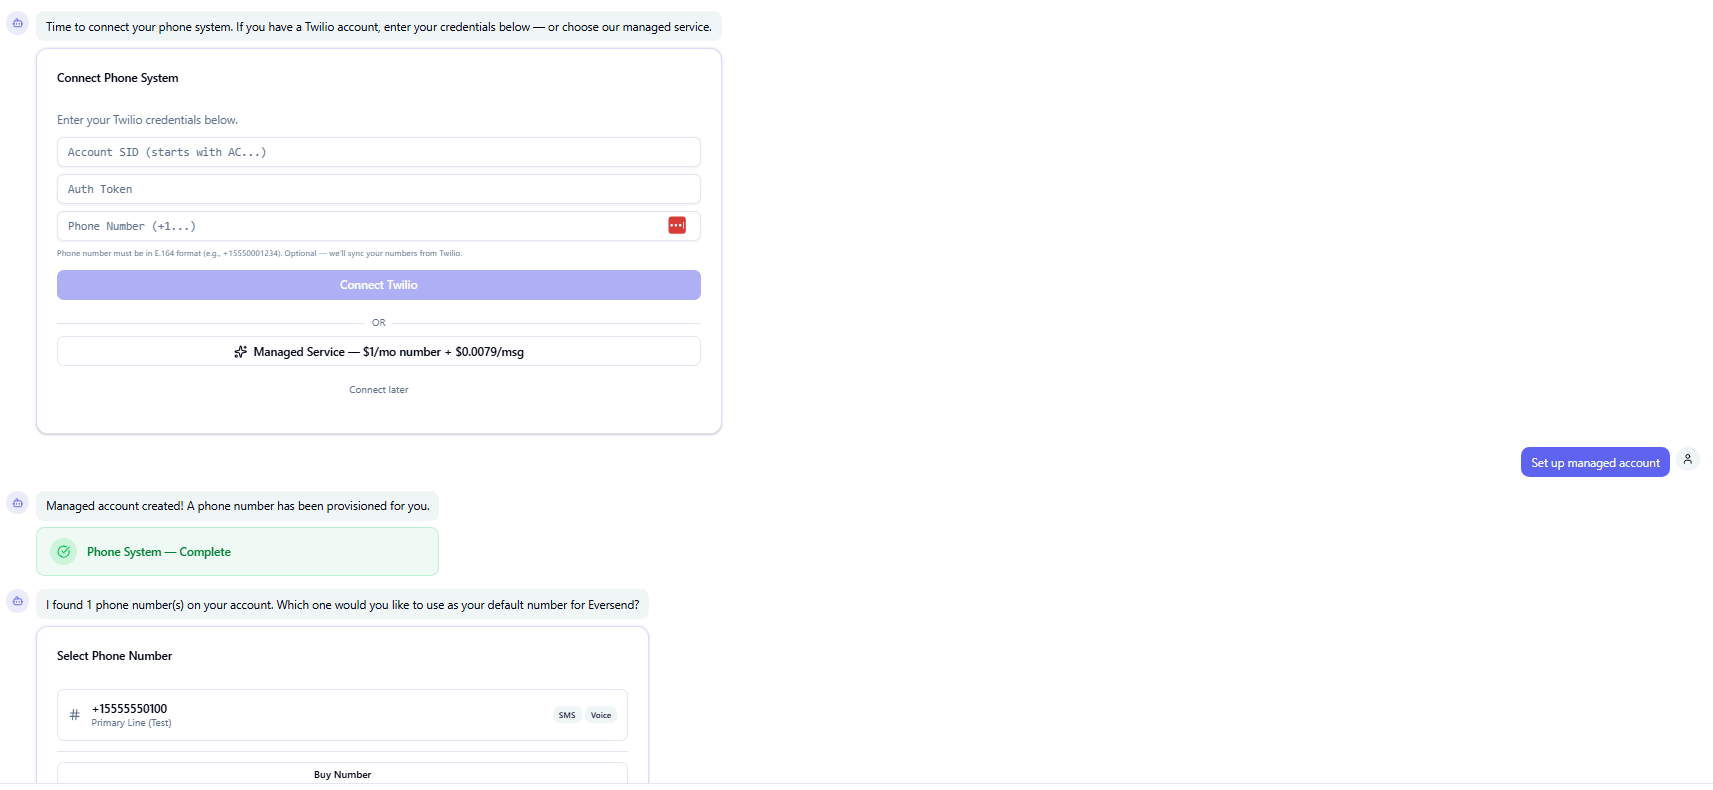
- Twilio account credentials
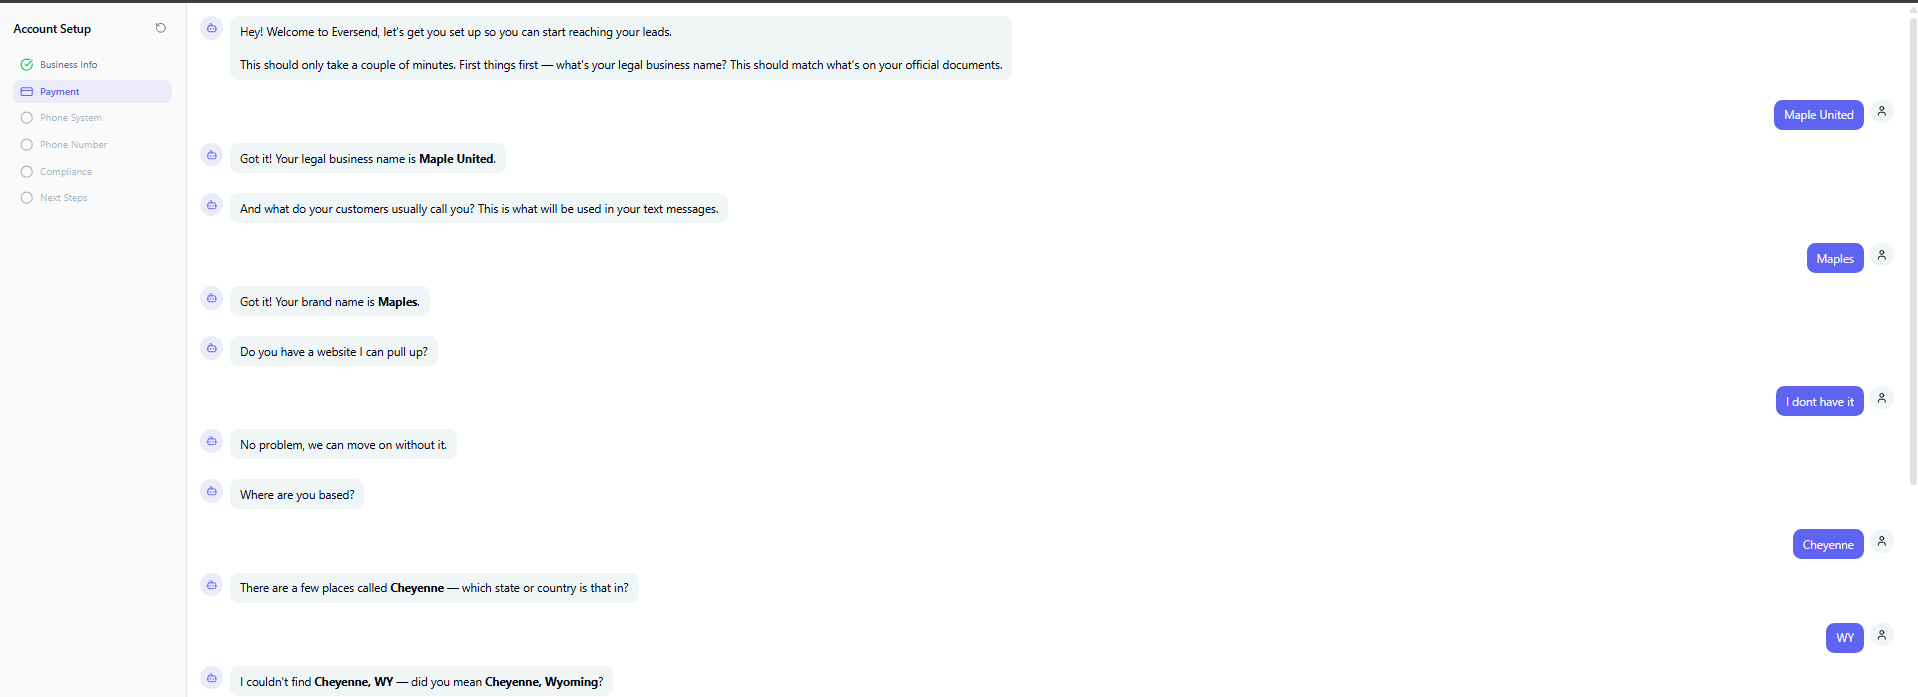
Step 1: Complete the AI Setup Assistant
When you log in for the first time, EVRSEND launches the AI Setup Assistant.
This assistant handles your full business onboarding, integrations, billing, and system configuration.
There is no manual setup.
The assistant will walk you through everything EVRSEND needs in order to configure your account.
This includes:
Business Setup
- Business name/legal name
- Secondary name, meaning the name your clients know
- Business location
- Lead location, such as US/Canada or International
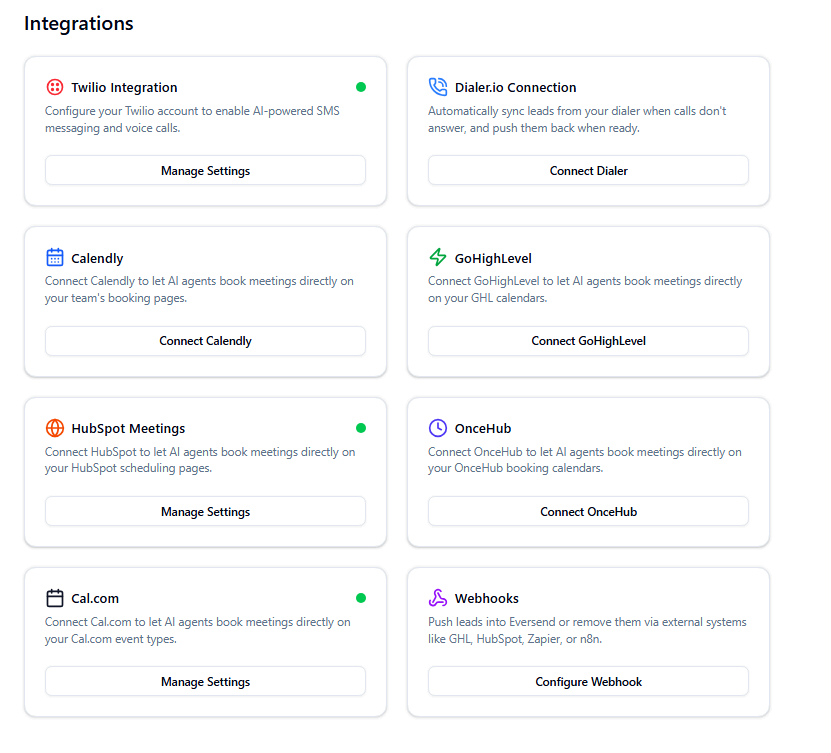
Platform Integrations
- Dialer connection
- Twilio connection
- Calendar connections
- CRM integrations
Messaging Setup
- Linking phone numbers
- Selecting sending numbers
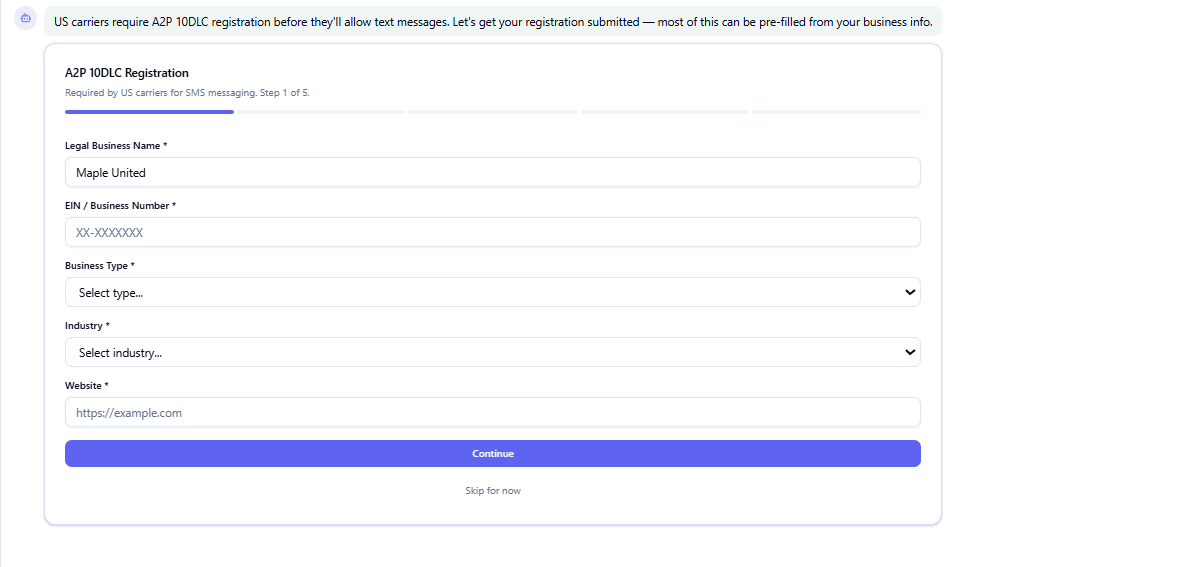
- Compliance requirements
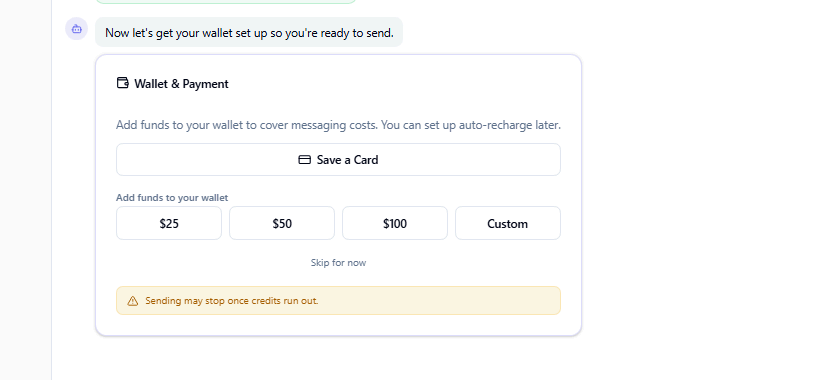
Billing Setup
- Payment method
- Credit card setup
- Wallet or messaging credits
Step 2: Build Your Agent or Campaign
Once onboarding is complete, you can launch the AI Agent or Campaign Builder.
This uses AI to ask strategic setup questions based on what you want to build.
The assistant will ask about:
- The purpose of the agent or campaign
- The type of leads being worked
- Lead sources
- Follow-up cadence
- Conversation goals
- Qualification criteria
- Objection handling
- Human handoff rules
- Booking or conversion goals
- Campaign stop conditions
Based on your answers, EVRSEND automatically builds:
- AI agent behavior
- Messaging sequences
- Follow-up logic
- Qualification flows
- Escalation rules
- Booking workflows
- Campaign automation
Step 3: Connect Your Calendar
To allow AI to book appointments:
- Go to Integrations > Calendar
- Select your calendar provider
- Authorize access
- Choose which calendars EVRSEND can book into
Supported calendars include:
- Google Calendar
- Outlook Calendar
- Calendly
- HubSpot
- GHL
- OnceHub
Step 4: Import or Add Leads
There are multiple ways to add leads.
Option A - CSV Import
- Navigate to Leads > Import
- Upload your CSV file
- Map your columns
- Confirm import
Option B - CRM Workflow
Connect your CRM workflows to push leads into EVRSEND automatically.
Option C - Webhooks/API
Use the EVRSEND API or inbound webhooks for real-time lead delivery.
Step 5: Run a Test
Before going live:
- Add a test lead
- Trigger the campaign
- Review messages
- Test booking links
- Test opt-out behavior
- Test human handoff
Step 6: Launch
Once testing is complete:
- Turn campaign status to Active
- Monitor first conversations
- Review delivery reports
- Watch for failed messages or routing issues
Dashboard & Monitoring
Use EVRSEND dashboards to monitor:
- Delivery rates
- Failed messages
- Response rates
- Appointment rates
- Opt-outs
- Cost per conversation
- Carrier health
Troubleshooting
Leads not entering the campaign or AI agent
Check:
- Workflow trigger
- API keys
- Campaign rules
- Lead assignment rules
Messages not sending
Check:
- Wallet balance
- Twilio connection
- Number health
- Compliance blocks
Calendar not booking
Check:
- Calendar permissions
- Availability settings
- Event duration settings
AI is not responding correctly
Check:
- Agent prompt
- Knowledge base
- Qualification logic
- Escalation rules
Need Help?
If you run into issues:
- Review the activity timeline on the lead profile
- Check integration logs
- Review webhook logs
- Contact support with your organization name and affected lead information
More guides for you
Keep exploring
HubSpot Integration
Trigger AI follow-up the moment a HubSpot workflow enrolls a contact.
 CRM · GoHighLevel
GoHighLevel Integration
Drop EverSend actions into GHL workflows for speed-to-lead in seconds.
 CRM · Close
Close CRM Integration
React to lead status and opportunity changes with automated AI calling.